Holmfirth Farmhouse Radical Retrofit: Internal Wall Insulation (IWI) Strategy
Our building team have been working away over the last few months on an adaptation and deep retrofit of some 19th century farm buildings to a single dwelling on the hills above Holmfirth, West Yorkshire. The project draws on the experience of all our radical retrofit projects up here on the hills in Yorkshire, while also making sure that we build on lessons learnt and with some variations and evolutions.
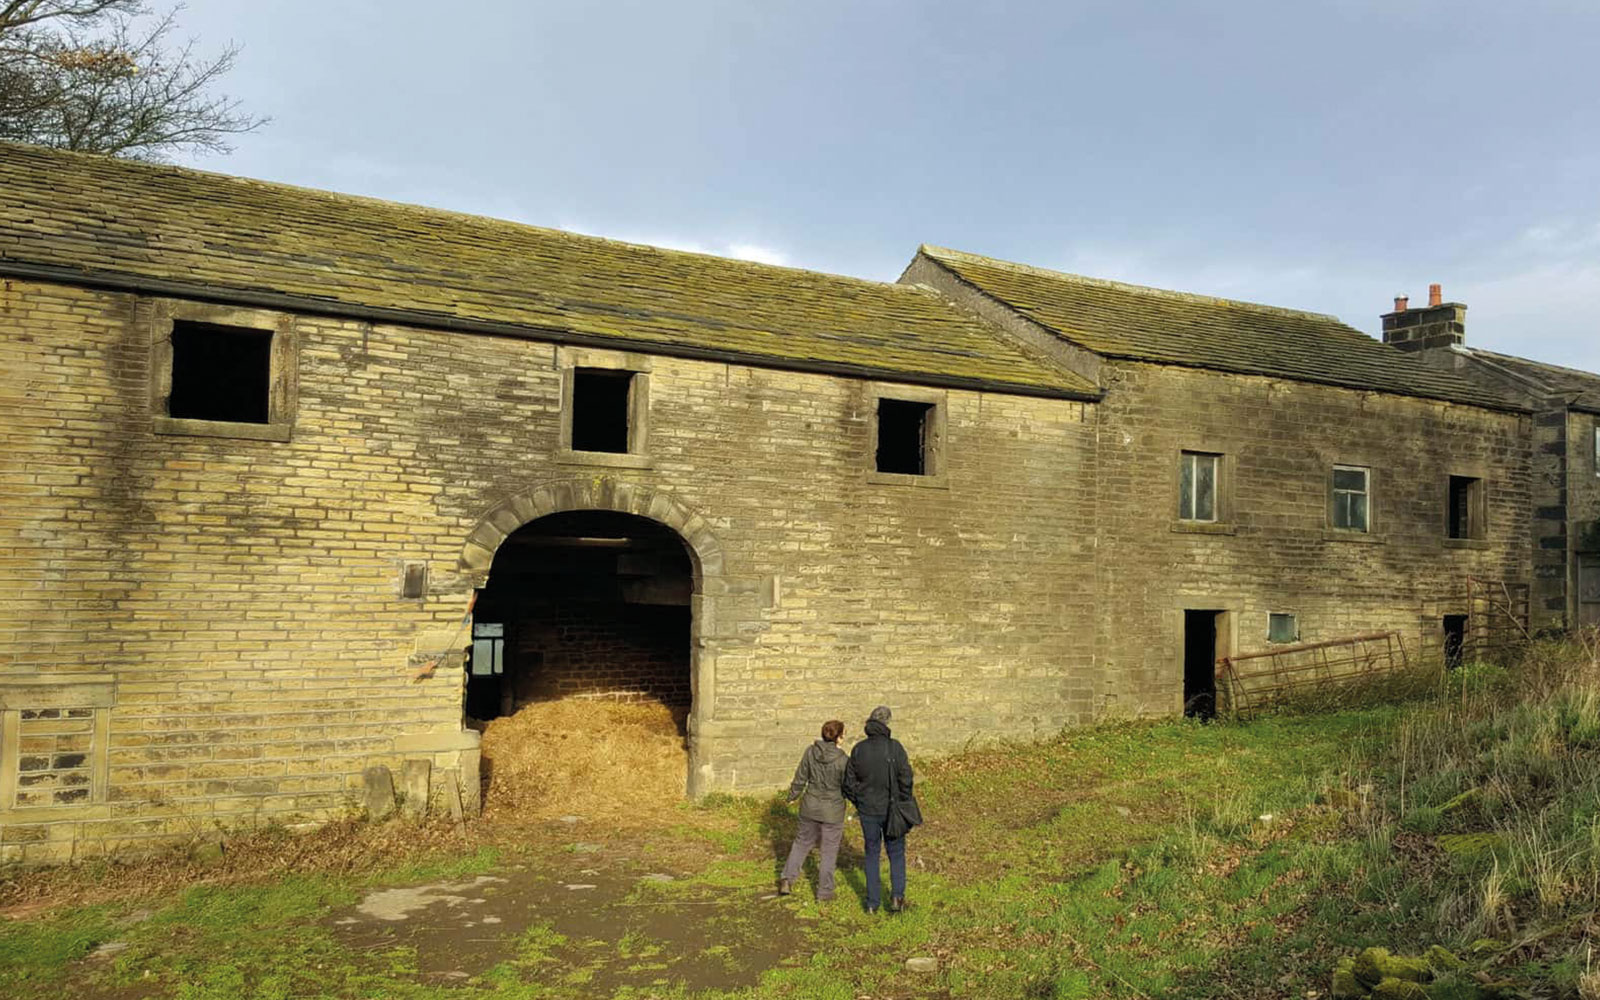
The original building comprised of three distinct sections, a barn, a two-storey dairy and a single storey milking parlour built at different stages over the 19th century. Construction is very traditional for this area of West Yorkshire and Peak District, 450 mm sandstone coursed rubble-filled walls with heavy stone slate roofs. The retrofit/conversion is being applied to the two-storey and single-storey buildings, while the barn is being left unimproved.
Lockdown
The project was well underway when lockdown was announced. Thorough COVID risk assessments and precautions are in place at the site, with the small building team managing to keep themselves socially distant and safe during construction. The isolated rural location and ease of transport to the site has made this easier to manage. A big thanks to all the team, who were determined to carry on with the project.
Project team
The client brief was for a retrofit and conversion similar to our previous Lower Royd project. We recommended Architect Sue Heywood at A+DP Architects, Holmfirth to prepare the plans for the planning stage, as we have worked previously with Sue on our Stirley Farm project. After planning consent was received, we took over to project manage under a Design and Build contract, as is normal for us on previous projects. Architectural technician Ashley Bamford was then employed to prepare working drawings for Building Control approval and for the building team to work from. Dan Sawyer is our Structural Engineer again on this project.
Planning constraints
The buildings are in the curtilage of a Listed Building so we have been very constrained as to what we can change, including number of window openings. This means that the amount of passive solar gain in the house is sub-optimal and maximizing glazing is an important consideration for the project. Using external wall insulation is obviously not possible either, due to planning constraints.
Terrible form factor
The retrofit is working on an L shaped building at different heights, which is a terrible form factor (the heat loss form factor is over 4.5). The heat loss form factor is the ratio of thermal envelope surface area (that can lose heat) to the floor area (that gets heated). It is a useful measure of the compactness of a building. Generally, the more compact a form, with few ‘sticking out’ features, the easier it will be to make it energy efficient. The lower the number of the Heat Loss Form Factor the more compact a building is. Ideally, a detached single dwelling Passivhaus would aim to achieve 3.5 or less. Our building is penalised not only for its ‘L’ shape but because of the large single-storey section.
Towards EnerPHit standard
We would love to be able to get the project to EnerPHit certification levels but the form factor and low solar gains mean that the only way it could be achieved is through the EnerPHit component method. I suspect that many EnerPHit projects in the UK are certified this way, because of similar constraints. If the airtightness result goes the way that we hope (under 1 ach/hour @50Pa) we could try for EnerPHit certification. We haven’t made a commitment to achieving this in the contract, but we’re keeping our fingers’ crossed.
One of the first decisions we’ve had to make on the project was what is our internal wall insulation strategy.
Walls
With internal wall insulation (IWI) we are aiming for a wall U value of 0.35 W/m2K. This is the elemental EnerPHit standard and is the accepted ‘rule of thumb’ limit for IWI to limit risks from interstitial condensation. This is exacerbated by the potential of rising damp and rain-driven moisture from being in a high exposure region using a relatively porous sandstone construction. We have been wrestling with this problem for many years and have dealt with it in various ways on our previous similar projects as readers of our previous blogs will know.
Exploring a hybrid approach – Diathonite & Wood Fibreboard
We have used Diathonite Evolution IWI at our Lower Royds project, which is a very similar building and location. Diathonite is a cork and lime insulating plaster which has very good thermal performance relative to other similar products. Just as importantly, it is vapour and capillary open allowing the wall to dry out naturally, airtight, inhibits mould growth, robust and looks good!
For this project, we were originally thinking of a different approach by using Diathonite as a flattening coat and then wood fibreboard because we thought that this might bypass the slow drying issues we experienced at the Lower Royd project and because it might potentially be quicker to install….and more economic. We were exploring having around 40 mm of Diathonite and 60 mm of wood fibreboard. Niall Crosson at Ecological Building Systems modelled this option in Wufi for us and it would have been fine, even though the house was in exposed location at the top of a hill. WUFI deemed that the 40mm of Diathonite to be a good buffer against any potential moisture issues .
Buildability
However, when I went back to Jude our site foreman and said this is what we’re going to do he said “No it isn’t – If we’ve got to get a machine in for the Diathonite we might as well carry on and do the whole lot in Diathonite (and not use wood fibre as well). It’s going to be far, far cheaper labour-wise”. So that’s what we decided.
Improved thermal performance and space-saving
Since our Lower Royd project, a new Diathonite product has been introduced. At Lower Royd we use Diathonite Evolution(with a lambda value of 0.045 W/mK). On this project, we are using Diathonite Thermactive (with a superior lambda value of 0.037 W/mK). The better insulation qualities of the Thermactive mean that we only need to use 85mm of IWI (as opposed to the 100mm of Diathonite Evolution we would have needed to achieve the same U value). Even though Thermactive is more expensive than Evolution we’ve ended up saving a bit of money on materials because of the reduced depth and better performance with the Thermactive. Hopefully, the reduced depth needed with the Thermactive will result in quicker drying times as well.
The 85 mm will be applied in 4-5 layers (a maximum of 25 mm in each layer) and there will also have to be a dubbing coat to level the wall to start with.
Installers
We had a search for various installers around the country to install the Diathonite but there was no one really nearby. We also started looking at local alternatives, including a friend of Jude’s but unfortunately, their existing spraying machinery just couldn’t cope. We’re very excited because we are now proud owners of a G4 3 phase larger spraying machine, suitable for applying Diathonite. Big thanks to Jasper Kirkman at Border Lime in Cumbria for his help and support to help us take this step. The team have had some training from the machine manufacturers in Rotherham and are raring to go. We hope this will help to keep costs down for our clients and will be an excellent long-term investment for the building team. This way, at least you’re not paying for travelling and hotel fees for installers. We are exploring whether we could offer Diathonite IWI sprayed on walls for low energy retrofits in the West Yorkshire area! (Warning: we already have a queue!)
In the next blog, I will look at the new approach we’ve taken to window detailing, as well as looking at the floor strategies at the project.
Bill Butcher, Director, Green Building Store


